Simple Rustic Bread cooking
This is my tried and true bread recipe. It was originally adapted from Mark Bittman's no knead bread, but I have made it my own at this point. I make it most weeks during fall, winter and spring (summer is too hot). The only things you might not have for this recipe are instant yeast, a deepish cast iron pot with a lid, and a scale. I hope you enjoy!
Ingredients
- 600g flour
- 1/4 tsp instant yeast
- 9g salt
- 450g water
Note: if you don't have a scale, take a look at the Appendix for volume measurements
Other Supplies
- Extra flour for dusting
- Rice flour or cornmeal for dusting
- Cast iron pot with lid
- Bowls for mixing and for rising the bread
- Kitchen towel
- Timer
Instructions
Mix dry ingredients. Add water. Turn with hand until dough is shaggy and sticky (it will not be uniform). Cover and let rest for 12-24 hours.
Uncover the dough mixture and notice how it has risen and has lots of air bubbles. Dust a surface with flour and scrape the dough out of the bowl onto the surface. Fold the dough over twice. Dust with flour, then cover with a kitchen towel. Let it sit for about 20 minutes (this is called the bench rest and is VERY important. Do NOT skip this step).
When the bench rest is complete, remove the kitchen towel, dust the top of the bread with flour, and flip it over using a bench knife so that the side with the flour is on the surface. Fold the bread into a ball of dough. I like to fold it in half once, then pick it up and fold it like a letter the other direction, then finish back in the same direction with a final tuck under.
Choose a bowl that will allow your bread to rise into a round loaf, place a kitchen towel inside, and dust the towel with some rice flour or corn meal. I prefer rice flour because it is less gritty, but either is fine.
Place your ball of dough with the seam side down onto the kitchen towel in the bowl. Lightly dust the top of the dough with rice flour and fold the towel over the top. Set a timer for 70 minutes.
When the timer goes off, place the cast iron pot and lid inside the oven and preheat to 450F. You want the cast iron pot to be very hot when you put the bread inside.
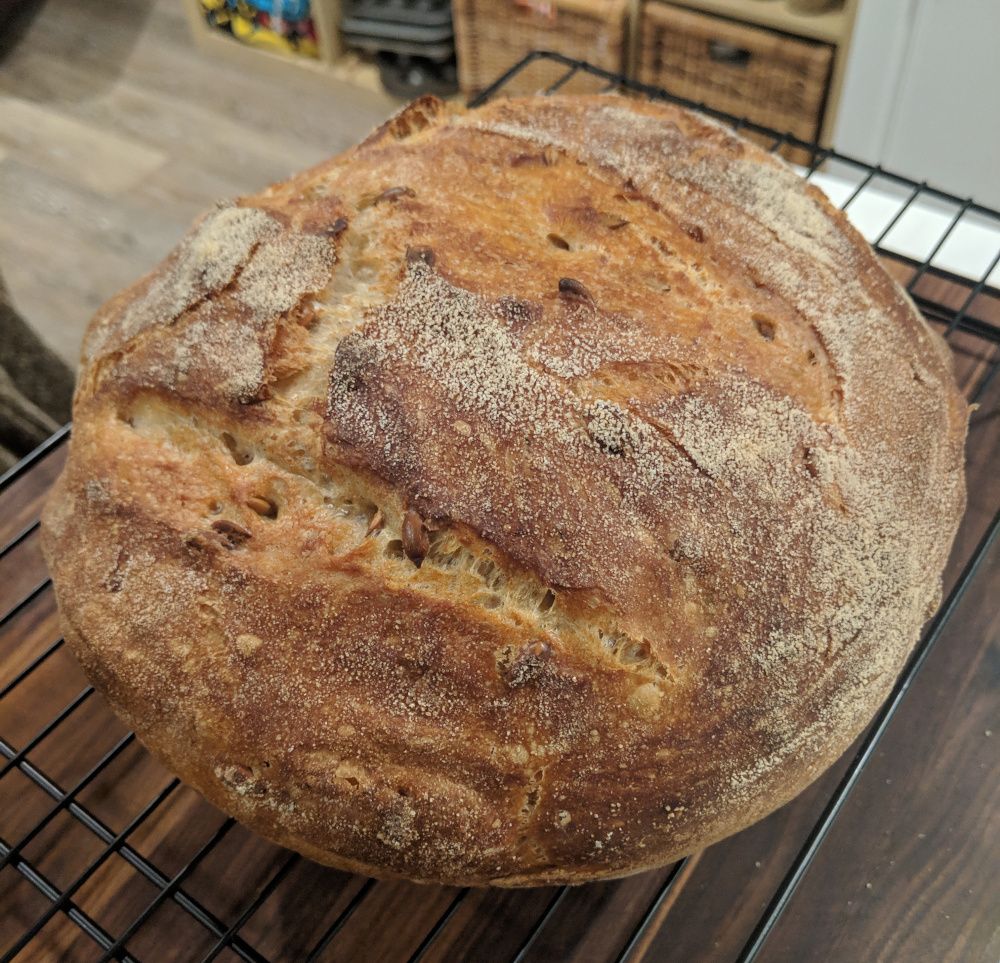
When the oven is hot and the bread is done rising, remove the cast iron pot and place on a hot pad. Remove the lid. Be VERY careful. If you touch the cast iron pot, it will severely burn your hand. Pick up the bread with the towel and turn it over to drop the bread into the cast iron pot. Score the top of the bread with a sharp knife or bread lame (I usually put three slits in it going in the same direction). Place the lid back on the cast iron pot and place in the oven. Set the timer for 20 minutes.
When the timer goes off, remove the lid. Bake for another 17 minutes. Remove from the oven. Turn bread out onto a cooling rack. Again, be VERY careful with the cast iron pot. If you listen to the bread, you will hear the crackling sound of deliciousness emanating from its golden brown surface. This is the song of bread ♫
Wait for the bread to cool, then slice and enjoy!
Ideas of how to enjoy your bread
- Toast with butter/jam
- With olive oil/vinegar/spices
- Slice into cubes, add some olive oil, sprinkle with salt and pepper and toast in the oven to make croutons for salad
- Sandwiches
Suggested Bread Schedules for Busy People
- Mix dough 6AM, bench rest at 6PM and bake at about 8PM
- Mix dough at 6PM, bench rest at 6AM (next day), and bake at about 8AM
Appendix
Ingredients by Volume
If you don't have a scale, this is less precise, but bread tends to be pretty forgiving.
- 3 cups flour
- 1/4 tsp instant yeast
- 1-1/4 tsp salt
- 1-5/8 cup water
Notes
Flour
I love King Arthur's Bread Flour. It yields incredible results. If you want the most delicious loaf imaginable, just use the bread flour. If you want some wheat in your loaf, just substitute some of the white for wheat. I have made up to 66% wheat and it was still delicious, just not quite as amazing as 100% white (which is like dessert).
Additions
I love adding pumpkin seeds to the bread. I add about 3/4 cup or so. It adds some heartiness and crunch.
Yeast
I like using instant yeast because it makes things even faster since you can mix it in with the flour. You can also use active dry yeast or even a dough starter as long as you pay attention to how much water you used to activate the yeast and remove that from that amount from the amount of water you will add to the entire mixture.
Preparation
Baking bread can be thought of in terms of percentages of mass. I try for a 75% hydration by water, which means that 75% of the mass of flour should be complemented with water. You can adjust the hydration percentage to achieve different results. I highly recommend mixing the ingredients using a scale (by mass). Baking bread by volume is much less precise, but bread tends to be forgiving, so you'll undoubtedly achieve good results this way too!